The Wavlink extender Setup welcomes you. We’ll take you step-by-step through the easy steps in this guide to wifi wavlink com login for flawless dual-band access. This guide will make sure that the process of configuring the adapter for your laptop or PC goes smoothly and without any problems.
Prior to Starting: Make sure you have the following things ready for the Wavlink extender Setup before we begin.
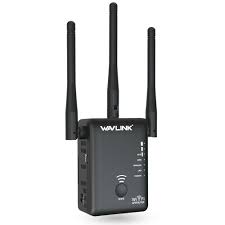
- Wireless network adapter Wavlink extender
- A PC having a USB port available
- either the most recent driver downloaded from the official Wavlink website or the Wavlink extender driver CD that came with the kit.
Wavlink extender manual setup
“Manual setup” refers to setting up and installing a system or equipment without the use of automated or pre-programmed procedures. In the world of technology, manually entering configurations, changing settings, and customizing various parameters to adapt a system or object to a specific need are sometimes required for Wavlink extender setup.
The following is the streamlined process for manually configuring the Wavlink extender extender:
- Position the extension in close proximity to your existing WiFi router.
- Attach the extension to a power source.
- Using the mode switch, choose the “Repeater” or “Extender” mode.
- Connect to the default Wi-Fi network of the extender using a computer or mobile device.
- You may access the web interface of the extender by typing its default IP address, 192.168.10.1, into a web browser.
- To log in, use your username and standard password.
- From the list of available networks, choose the Wi-Fi network you are presently using.
- Provide the password for the Wi-Fi network you are currently connected to if prompted.
- You can change the extender’s password, network name, and other settings to suit your needs.
- Save the configurations using the online interface of the extender.
- After unplugging the extension, place it somewhere useful.
- Re-establish the connection between your devices and the extended wireless network of the extender.
Okay, I’m done! The Wavlink extender’s manual configuration is now finished.
Setting up a Wavlink extender using a WPS button
Setting up the Wavlink extender is easy when you use the WPS (Wi-Fi Protected Setup) button. To set up your extender, take the following actions:
- Wavlink extender setup usually requires pressing the WPS button, which is located on the side or bottom of the device. It might have “WPS” written on it or the WPS logo on it.
- To configure the Wavlink extender, hold down the WPS button on the device for a few seconds until the Wi-Fi LED indication starts to blink. This indicates that the extender is now in WPS mode and ready to connect to your Wi-Fi network.
- To activate the WPS mode, locate and hit the WPS button on your WiFi router. You can find comprehensive instructions in your router’s handbook.
- Once both devices have WPS mode enabled, the extender and your Wi-Fi router will instantly establish a secure wireless connection. This process could take a few moments. Once the connection has been established, the Wi-Fi LED indication on the extender will cease flickering and remain stable.
Congratulations! The Wavlink extender Setup is now complete! You may now use your computer with dependable dual-band Wi-Fi connectivity that operates at fast speeds. Consult the user manual or the Wavlink website for assistance if you run into any problems or require more help.
Procedure for Wavlink extender Reset
To reset the Wavlink extender, take the following actions:
- Find the Reset Button: On the Wavlink extender adapter, look for the tiny pinhole-shaped reset button.
- Get a paperclip or other tiny object that fits into the reset button’s pinhole to get ready.
- To reset the extender, place a thin object into the pinhole of the button and hold it there for ten to fifteen seconds while the device is powered on. Release the reset button after the specified duration.
- Await the completion of the reset: the extender will return to its original factory configurations. Hold on for a few seconds—during which the LED indications can blink.
- Reconfigure the Adapter: If required, use the setup tutorial to reconfigure the extender adapter to function with your Wi-Fi network.
Resetting the adapter will remove all customized settings and return it to its original settings. Keep this in mind.
Update Wavlink extender Firmware
Below is a brief summary of the Wavlink extender Firmware Update procedure:
- Get the most recent firmware by visiting the official Wavlink website.
- Utilizing USB, link the extender adapter to your PC.
- Using its IP address, you can use a web browser to access the adapter’s settings (see the user manual).
- Use the default login information, which is often “admin” for both the username and password.
- Navigate to the “System Update” or “Firmware Update” section of the adapter’s settings.
- After downloading the firmware file, upload and install it.
- After the update is complete, restart the extender adapter to have the changes take effect.
The firmware has now been updated.